Day 16:SPI Driver (Part 2) - 傳簡單的訊息!
任務:傳訊息
接下來會做的事情是:試著用 SPI 的 API 傳輸一些簡單的東西。
由核心文件中 The Linux driver implementer’s API guide 中的 Serial Peripheral Interface (SPI) 章節可以看到下面的資訊:
"The I/O model is a set of queued messages. Protocol drivers submit one or more struct spi_message objects, which are processed and completed asynchronously. (There are synchronous wrappers, however.) Messages are built from one or more struct spi_transfer objects, each of which wraps a full duplex SPI transfer..."
所以簡單來說就是:一個 struct spi_message 由很多 struct spi_transfer 組成。不過這樣看起來還不是很確定要怎麼使用。這時候就想到:現在已經有一個現成的驅動程式了,就是 spidev。把他打開來看一看。
例子:spidev
因為已經知道這是一個字元驅動程式,所以第一件事情就開開看他的 struct file_operations 裡面的 write 長什麼樣子。就會發現:
static const struct file_operations spidev_fops = {
    .owner =    THIS_MODULE,
    /* REVISIT switch to aio primitives, so that userspace
     * gets more complete API coverage.  It'll simplify things
     * too, except for the locking.
     */
    .write =    spidev_write,
    .read =        spidev_read,
    .unlocked_ioctl = spidev_ioctl,
    .compat_ioctl = spidev_compat_ioctl,
    .open =        spidev_open,
    .release =    spidev_release,
    .llseek =    no_llseek,
};
除此之外,也可以發線這個結構體被註冊到字元驅動程式裡面的部分,看來他就是對應的檔案操作了。把 spidev_write 拿出來看看,會發現除了一些檢查程序跟資料複製之外,傳送的動作都在 spidev_sync_write 當中。這邊就可以看到 spi_message 的用法:
static inline ssize_t
spidev_sync_write(struct spidev_data *spidev, size_t len)
{
    struct spi_transfer    t = {
            .tx_buf        = spidev->tx_buffer,
            .len        = len,
            .speed_hz    = spidev->speed_hz,
        };
    struct spi_message    m;

    spi_message_init(&m);
    spi_message_add_tail(&t, &m);
    return spidev_sync(spidev, &m);
}
其中,最後的 spidev_sync 其實就是檢查跟鎖住一些資源之後,把 m 丟給 spi_sync:
static ssize_t
spidev_sync(struct spidev_data *spidev, struct spi_message *message)
{
    int status;
    struct spi_device *spi;

    spin_lock_irq(&spidev->spi_lock);
    spi = spidev->spi;
    spin_unlock_irq(&spidev->spi_lock);

    if (spi == NULL)
        status = -ESHUTDOWN;
    else
        status = spi_sync(spi, message);

    if (status == 0)
        status = message->actual_length;

    return status;
}
結論:傳輸的流程
所以,現在大致上有個概念,流程可能會像是:
- 初始化一個
struct spi_message。 - 初始化
spi_transfer,並把他加入spi_message:這邊是使用spi_message_add_tail。而且以寫入為例,他提供了tx_buf。 - 使用
spi_sync,把spi_message傳出去。
文件表示:
看完文件跟例子之後,接下來看看 Serial Peripheral Interface (SPI) 中的資料結構中的說明:
Step 1:初始化 struct spi_message
文件在這裡。裡面提到:
"A spi_message is used to execute an atomic sequence of data transfers, each represented by a struct spi_transfer. The sequence is “atomic” in the sense that no other spi_message may use that SPI bus until that sequence completes."
然後有一個文件中沒有提到,但是從剛剛的 spidev 的例子,以及 spi.h 中有的 spi_message_init 原始程式碼來看,他的功能是用來初始化spi_message。
Step 2:初始化 struct spi_transfer
首先去翻文件中,關於 struct spi_transfer 的部分。可以發現他開宗明義就說:
"a read/write buffer pair"
從他的成員中可以看到,最主要是 tx_buf 與 rx_buf。由 spidev 的例子可以推測裡面放得是要傳輸的資料,或是寫入時使用的 buffer。
從 struct message 的結構來看,這些 spi_transfer 在 spi_message 中,是由 struct list_head 串起來的。所以應該會期待有某種 linked-list 的操作。而從 spidev 的例子來看,應該是用 spi_message_add_tail 這個函數。而他的實作也根本就是 linked-list 的插入:
static inline void
spi_message_add_tail(struct spi_transfer *t, struct spi_message *m)
{
    list_add_tail(&t->transfer_list, &m->transfers);
}
Step 3:spi_sync
"blocking/synchronous SPI data transfers"
在這之前應該先看看 asynchronous 的 spi_async。文件裡面說到:
"The basic I/O primitive is spi_async(). Async requests may be issued in any context (irq handler, task, etc) and completion is reported using a callback provided with the message. After any detected error, the chip is deselected and processing of that spi_message is aborted."
而關於 spi_sync,則有以下的描述:
"There are also synchronous wrappers like spi_sync(), and wrappers like spi_read(), spi_write(), and spi_write_then_read(). These may be issued only in contexts that may sleep, and they’re all clean (and small, and “optional”) layers over spi_async()."
因此可以看得出來:除了同步與不同步之外,這些建立在 spi_async 之上的功能,還會有休眠的問題。但總之,spi_sync 是個 spi_async 的 wrapper,用來傳輸 spi_message 。
其他 wrapper
從文件看來,除了像 spidev 中的使用方法,還有一些變種。比如說給一個 spi_transfer 陣列,然後會幫忙初始化好並且傳過去的 spi_message_init_with_transfers; 給定一個 spi_transfer 陣列,然後會把那個陣列裡面的 spi_transfer 通通發出去的 spi_sync_transfer、或是跟 write 很像,給字串與長度進行傳輸的 spi_write等等。
程式
接下來在 probe 時除了會在 dmesg 中印出訊息,也會在 probe 裡面透過 SPI 傳送一個訊息給 Arduino:
Raspberry Pi
為了方便,就只列出 probe 的部分:
static int dummy_probe(struct spi_device *spi)
{
    int status = 0;
    char *msg = "SPI message transfer test";
    int len = strlen(msg);
    struct spi_transfer t = {
        .tx_buf = msg,
    .len = len,
    };
    struct spi_message m;

    pr_info("Dummy SPI device being probed.\n");

    spi -> max_speed_hz = 400000;
    spi_setup(spi);

    spi_message_init(&m);
    spi_message_add_tail(&t, &m);
    spi_sync(spi, &m);

    if (status) {
        pr_err("SPI transfer failed.\n");
    return status;
    }
    return 0;
}
Arduino
一樣是一個 circular buffer,有新資料進來就把他推進去,並且每一秒印出一次 buffer 中的內容:
#include <SPI.h>
void setup() {
    Serial.begin(9600);
    pinMode(MISO, OUTPUT);
    pinMode(MOSI, INPUT);
    SPCR |= _BV(SPE);
    SPCR |= _BV(SPIE);
    SPCR &= ~(_BV(MSTR));
}

#define BUF_LEN 128
char buf[BUF_LEN + 1] = {0};
int top = -1;
ISR(SPI_STC_vect)
{
    buf[(++top) % BUF_LEN] = SPDR;
}

void loop() {
    Serial.println(buf);
    delay(1000);
}
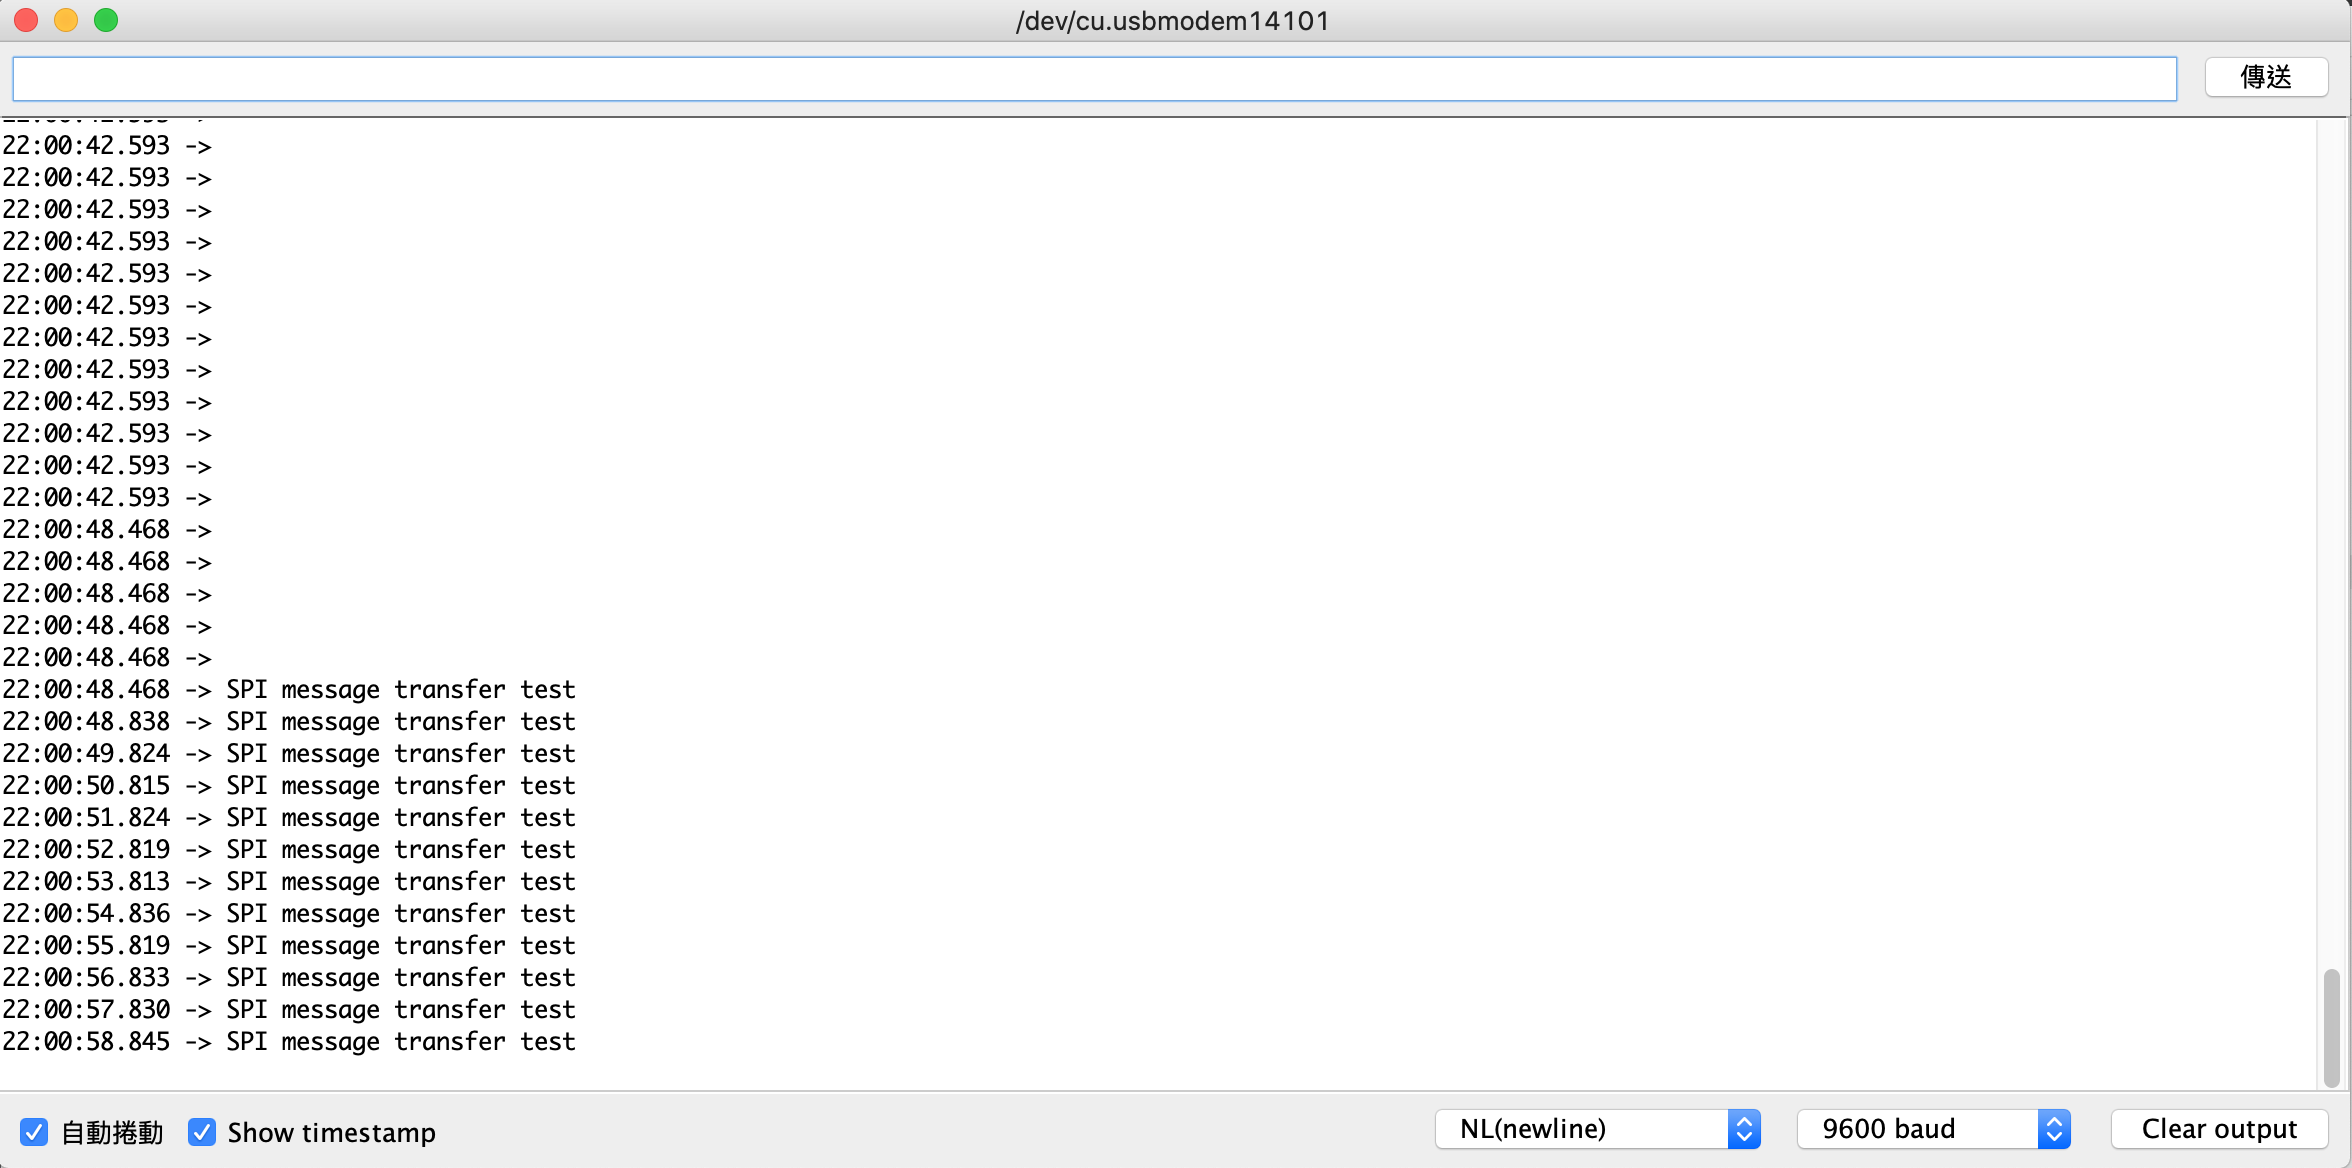
結果
打開 Arduino 的序列埠,並且載入模組。就會發現訊息成功被傳送了: